
Appearance
Studio
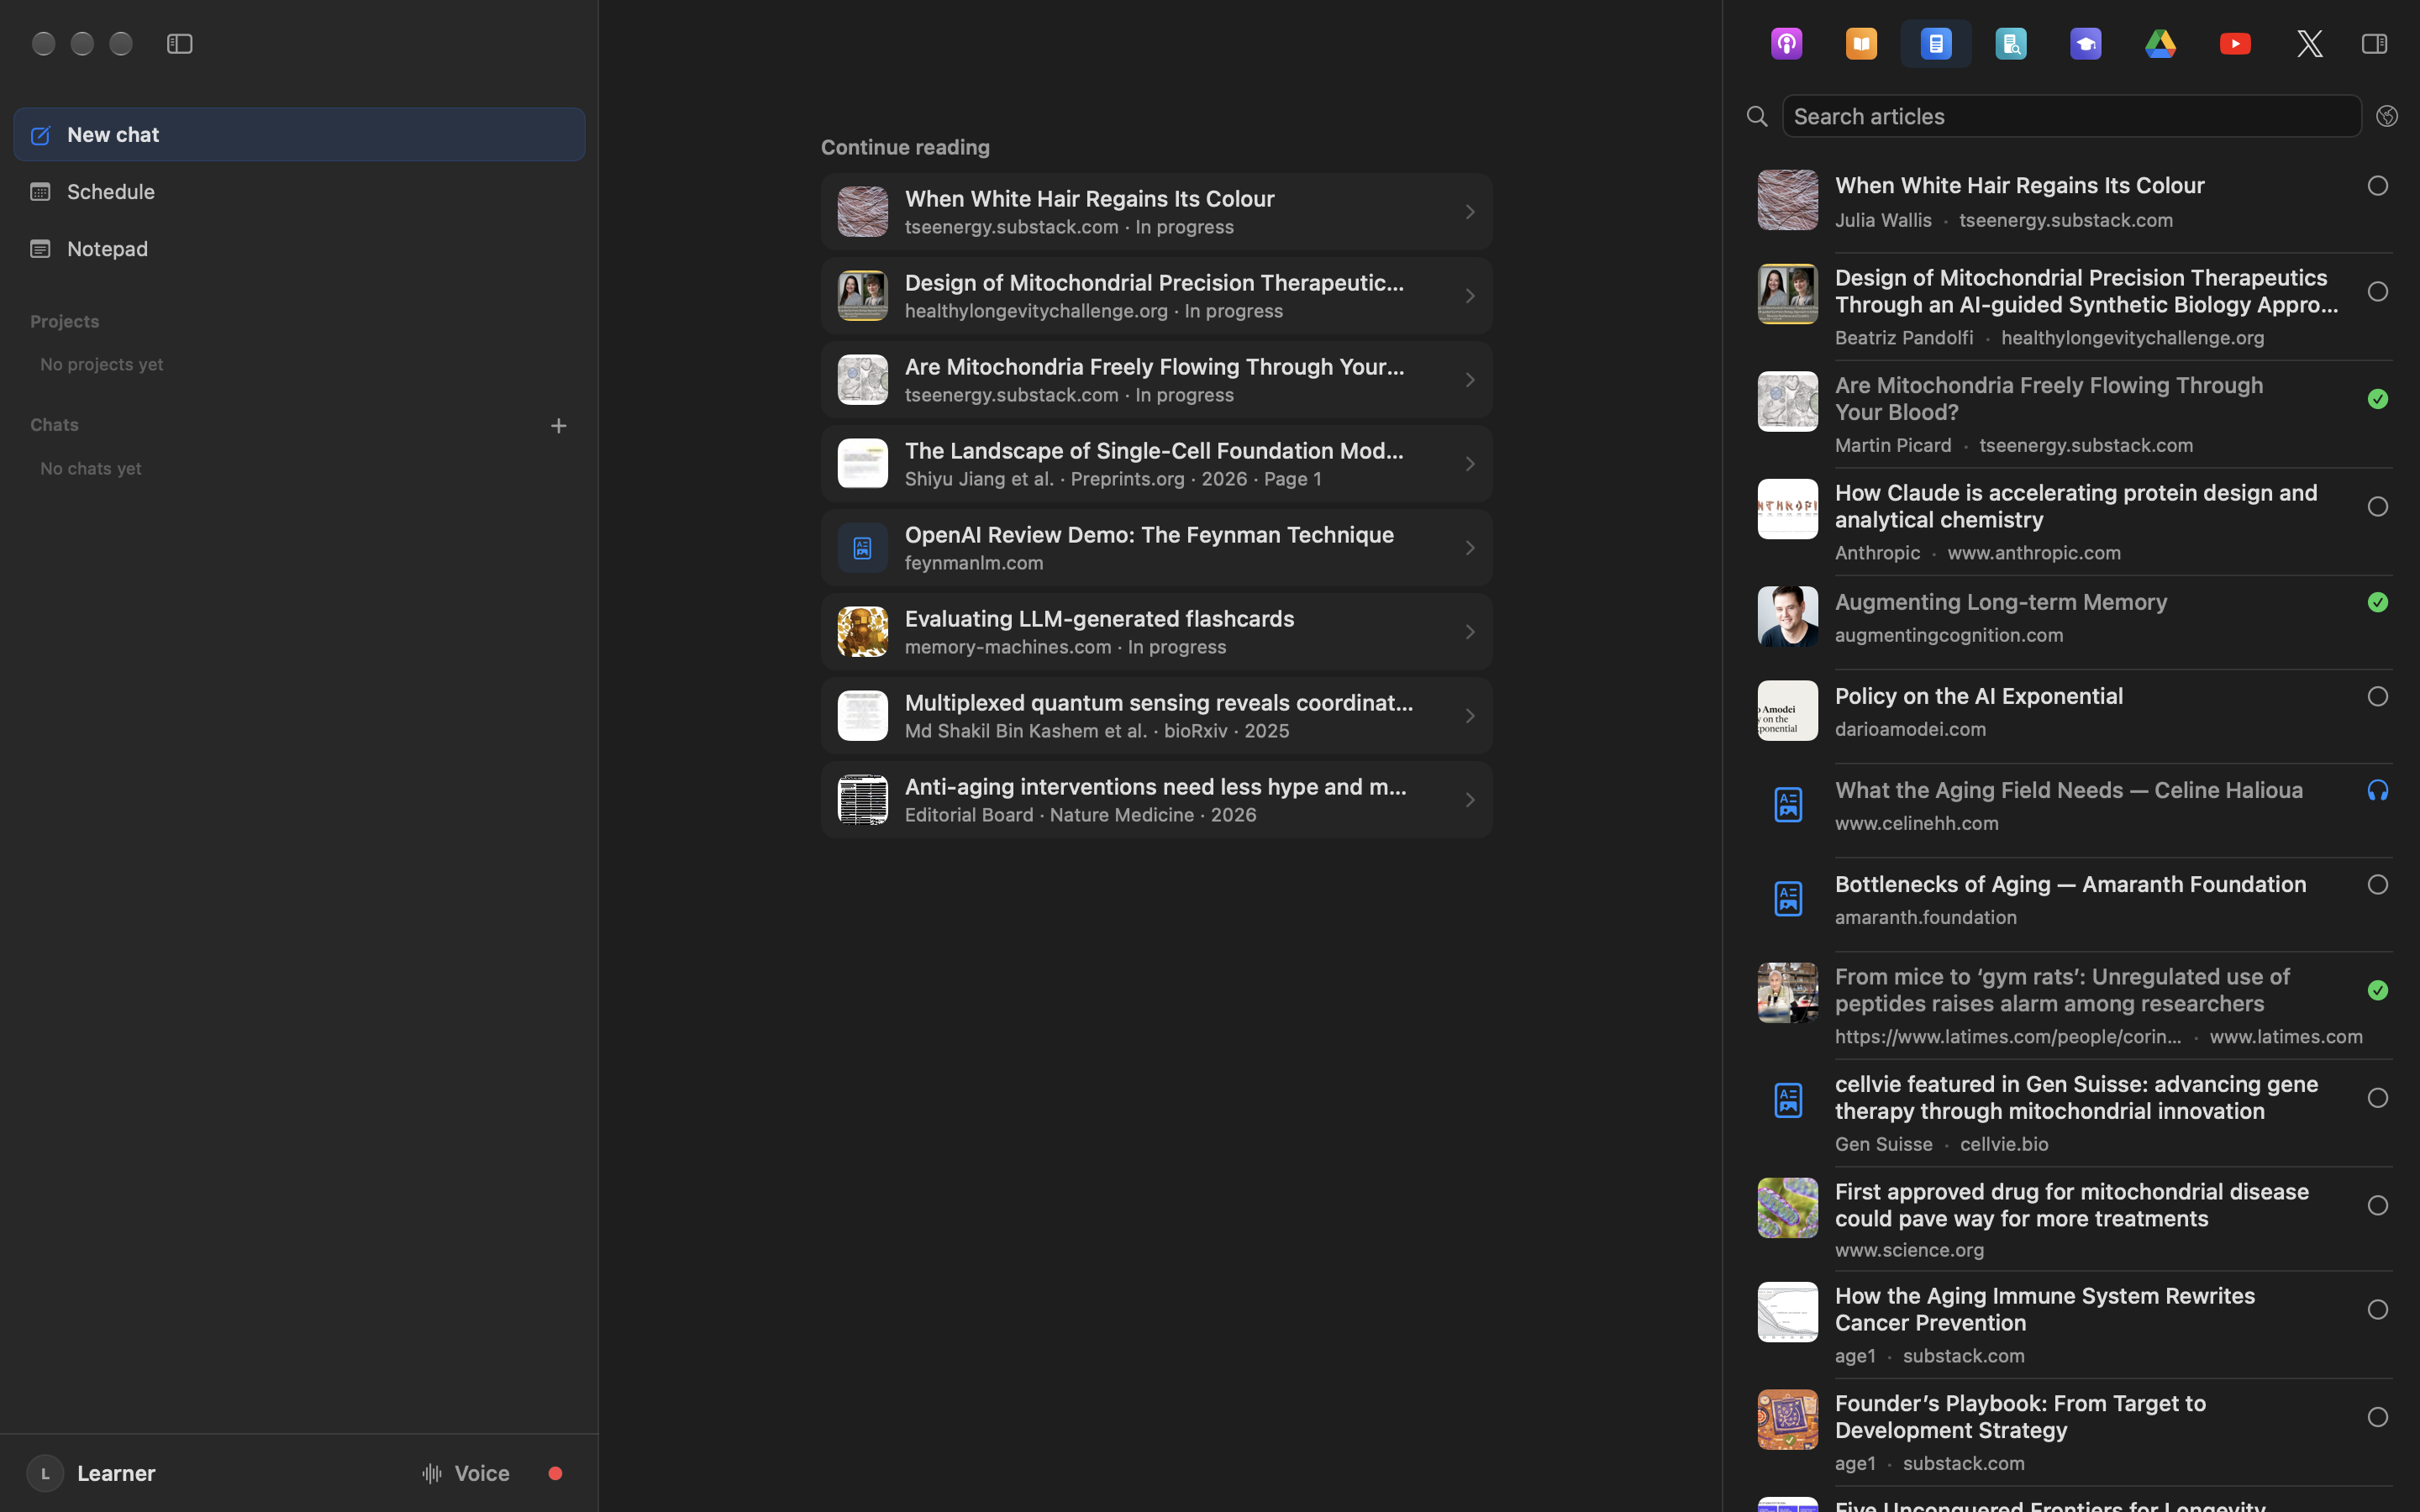
Studio is ForeverLM's window, and you work in it in a notebook: the sources for one piece of work — a topic, a person's work, a paper to review, a meeting to prepare — with a chat that reads them and a Studio column that makes things from them. Your library holds every source once. A notebook only points at the sources it uses, so one paper can be in any number of notebooks, removing it from a notebook never deletes it, and the whole library stays one search away from inside any notebook. The cards you keep and review span every notebook (Memory).
Notebooks
Your notebooks in the Space
The Space is ForeverLM's home. A window opens in the notebook you last worked in on this Mac (opened, chatted in, or added a source to); with no notebook yet, or when that notebook was archived, deleted or belongs to another library, the window shows the Space's All list. Spaces in the rail, the rail's Notebooks heading, ⌘P (View → Space), Close Notebook and ‹ at the top of an open notebook take you there too.
All lists every notebook and course beside your pages, sites and canvases. A notebook shows its cover, or its emoji on its own soft colour (an emoji at the start of the title is its icon; without one, ForeverLM picks one that fits the title, the same on every device), dated by when you last worked in it. Click a notebook to open it; drag a source or a course onto it to add it. Its ⋯ and right-click menu have Open in Other Window, Share…, Add to Collection ▸, Pin, Draw Cover With ▸, Archive, Merge into Notebook… and Delete Notebook…. The Space's search finds a notebook by its title, description or topic, and New ▸ Notebook makes one.
Collections group notebooks, as in Gemini Notebook. Add to Collection ▸ in a notebook's menu puts it in a collection (a notebook can be in several) or makes a New Collection…. Once you have one, the list's sort and filter menu offers Group by Collection: All shows each collection's notebooks under its heading, and everything else last. A heading's ⋯ renames or deletes the collection; deleting it leaves its notebooks where they are. Collections follow your account to your other Macs, the web app and the iPhone, where the notebook list can show one collection at a time.
Archived notebooks are in the Space's Trash, after any pages and sites you put there. Point at one for Restore, or use its menu to open, merge or delete it. Empty Trash leaves them alone.
A new notebook opens at once, with nothing to fill in. It reads New notebook until you add a source or start a chat; then ForeverLM names it and writes the line on its card. Once you rename it, ForeverLM never renames it again.
Inside a notebook
A notebook fills the window in three columns, as in Gemini Notebook:
| Column | What it holds |
|---|---|
| Sources (left) | ‹ back to the Space, the notebook's name (click it to rename) and its ⋯ menu. Sources with Add sources, one field that searches the notebook, your whole library and the web (see Searching for sources), "8 of 12 in chat" with Select all, then its sources by type, then a group for each notebook it uses context from. Each source has a box: ticked sources are what the notebook's chats read and what its Studio makes things from. Click a source to read it beside the chat; its ⋯ has Open, Open in Other Window and Remove from Notebook. An empty notebook offers Suggested from your library, each row one click from joining, and Add all. Drop PDFs from Finder or a browser on the column to import them as papers into the notebook |
| Chat (center) | The notebook's chat, and beside it one document: the Reader, a Page, a Site, an animation, a course's page, the Browser, Memory or a second chat. The Reader is the full one: a paper with its figures, a video with its transcript, a book, a web page. A new document replaces the one beside the chat; the divider between them drags, and each has its × |
| Studio (right) | Share at its top right (Sharing a notebook), then what you can make from the ticked sources, and everything the notebook made |
An empty notebook chat shows the notebook's name and description, and, once it has sources, Suggest questions and Quiz me on it, then the notebook's latest chats; with no sources it offers Add sources. The chat's ⋯ has Chats in This Notebook ▸: New Chat starts a chat in the notebook the window holds, reading its ticked sources, and the notebook's chats follow. A chat filed in a notebook opens in that notebook, and a library chat (one in no notebook) leaves it. Coming back to a notebook reopens the chat you last had open in it.
Following a link never closes what you read it in: a citation or a Page's source opens the Reader beside the chat, and the Reader's Back to control, named after what it replaced (a Page, a Site, Memory, …), brings that back in one click. In the Reader's ⋯ menu, Add to and the notebook's name (Add to “Bioelectricity”) files the source you are reading into the notebook the window holds.
When a paper opens beside the chat in a narrow window, Sources folds to a strip with an icon for each source, and Studio stays; if there is still no room, Studio folds to a strip of Share and its outputs, and then the rail steps aside for that window until it widens again. A strip's top button brings its column back. The Notebook menu holds Add Sources… (⇧⌘I), Show/Hide Sources (⌃⌥⌘S), Show/Hide Studio, Make ▸ (the Studio's tiles), New Note, Rename Notebook… and Close Notebook. Two windows can hold two notebooks; each keeps its own.
The notebook's ⋯ (beside its name) has Add Sources…, Add a Notebook to Context, Think First ▸, Rename Notebook…, Unpin from Sidebar or Pin to Sidebar, Archive Notebook (Restore Notebook on an archived one), Share…, Share with Team ▸, Merge into Notebook…, Open in Other Window, Close Notebook and Delete Notebook….
On the iPhone, Home is the list of your notebooks, and a notebook has Sources, Chat and Studio tabs, with Share beside its ⋯. The Web Library opens notebooks the same way.
The Studio column
The Studio's tiles make something from the notebook's ticked sources. Each asks first — options, the sources it reads, and the price where there is one — and makes on the second press:
- Audio overview: a spoken overview of the sources, read in one narrator's voice (your text-to-speech voice), as a Deep dive, a Brief or a Critique, at a length you pick, with an optional focus. It plays in the window's player.
- Cards: the notebook's cards ("42 kept · 6 due · 9 to check"), Practice, Make Cards… and Open in Memory (see Memory).
- Mnemonic reading: the ticked sources read as their own text with a recall question after each passage it tests, the way quantum.country's essays are written (see Mnemonic readings).
- Report: Briefing, Study guide, Questions for a meeting, Feedback on a document or Custom…, written into a Page in the notebook. Each claim in it links to the passage of the source it rests on, and the Page ends with the sources it was made from.
- Video overview: choose one or more MP4, M4V or MOV files, such as a video overview downloaded from Gemini Notebook. Each is copied into your library as a video, listed under the notebook's outputs, and plays in the Reader. It has no transcript, and importing the same file again adds nothing new.
- Deep research: a Deep Research chat in the notebook, reading the ticked sources and waiting for your question.
- Course: a course-planning chat reading the ticked sources (see Generating a course).
- Explainer: pick one of the ticked papers, articles, podcast episodes, videos or meetings for its spoken explainer.
- Feynman Technique: pick one of the ticked sources, of any kind, and explain it yourself. A chat opens in the notebook asking you to explain it in your own words, from memory, as you would to a bright friend who hasn't come across it. The tutor plays that friend and never explains first: after each answer it says what came across, then asks one question at the biggest gap, such as a term you didn't define, a step you skipped, a claim with no evidence or a mechanism you waved through. When something you say is wrong it asks a question that lets you notice; if your second try still misses, it shows you the place in the source, in the Reader beside the chat, and asks you to explain that part again. Once your explanation holds, it asks for the simplest version, then for the source's assumptions and limits. It goes on until you stop. The chat is kept as a review, and reopened later, on this Mac or another, it goes on probing. The Notebook menu's Make ▸ has it too, and so does Web Studio.
- Add note (floating at the foot of the column): a new Page in the notebook, open beside the chat.
Below the tiles, Outputs lists what the notebook made under its Cards row, newest first by when each was made: audio overviews, reports and other Pages, mnemonic readings, Sites, animations, pictures, videos, the courses the notebook follows, and the walkthroughs, explainers and narrations of its own sources (a walkthrough belongs to every notebook that holds its source). This is the one list of a notebook's pictures, animations, audio overviews, videos, walkthroughs and narrations. A picture's ⋯ has Rename…, Add to Notebook ▸ (which moves it, since a picture lives in one notebook), Copy Image, Copy Prompt, Show in Finder and Move to Trash, and you can drag it out as a file. Click a narration to open its source in the Reader and play it. Each says what it is, how many sources it was made from and when ("Briefing · 6 sources · 1 hour ago"), with a dot until you open it on this Mac. A report, an audio overview or a mnemonic reading being written shows its stage and Stop; an audio overview plays from its row. Click an output to open it beside the chat; its ⋯ has Open, Open in Other Window, Rename… for a Page, Site or animation, Prompt and Sources (what it was made to and from, each source a click from the Reader) and, for a Page, Site or animation, Remove from Notebook. In an archived notebook, or a team notebook you can only view, the tiles that would file something into it are off; Cards stays on.
Searching for sources
The Sources column's field, Search your library and the web, has Library, Web and PubMed under it.
- Library answers as you type: the notebook's own matching sources under In this notebook, then In your library, sources from the rest of your library with a + that adds one to the notebook. Clicking one opens it in the Reader beside the chat without adding it. Below them, Search the web for “…” and Search PubMed for “…” take your words there.
- Return searches the web for your words (from Library too) or runs the Web or PubMed search you chose. A web search uses your model and is priced like a chat turn, and PubMed is free. The results arrive as a card at the top of the column: how many it found and how many your library already holds, the first three with why each fits, N more, Add N for the ticked ones, and × to put the card away.
- N more widens the column to the whole list, with a box for each result, ↗ to open its page beside the chat, Select all, Add and Research this deeply (a Deep Research chat in the notebook with your words typed). A result your library already holds joins the notebook as it is, never imported twice. ‹ Sources goes back.
Adding sources
Add sources (in the Sources column, the ⋯ menu, an empty chat, or ⇧⌘I) opens a sheet:
- One field, Search your library or paste a link. With nothing typed it shows Suggested from your library. A search finds sources by title, author, text and meaning; tick rows and press Add N, or Add all N (above ten it asks first), or a row's + on its own. A pasted link or DOI shows Add link, which adds the page to your library and the notebook in one step; a page the library already holds only joins the notebook. Upload PDF… imports PDFs from disk as papers in the notebook.
The web and PubMed are searched from the Sources column's own field (see Searching for sources).
The rail
The navigation rail is a narrow strip of icons: +, which starts a new chat (in a notebook window, a chat in that notebook), then Spaces, Memory, Library and Plugins, and at its foot the calendar glyph that opens today's schedule (see Layout) and your account. Each icon can be hidden from its own menu and brought back with Show in Sidebar; hiding New chat also takes it out of the sidebar beside a chat.
To keep a place one click away, drag its row from the Space's sidebar (Pages, Notebooks, Courses, Google Drive and the rest) onto the strip, or tick it under the strip's ⋯ › Show in Sidebar. It stays under a short line as its icon alone. Drop a place on a kept icon to put it above that one, drag a kept icon up or down to reorder, and right-click it for Remove from Sidebar.
While anything that costs money runs in the background, a grey OpenRouter logo shows in the strip; click it for Running in the background: each narration, automatic audio, explainer video, mnemonic reading, scheduled task run and assistant job, and every paid step ForeverLM takes on its own, such as Text-to-Speech Preparation, Paper Metadata, a recording's transcription or a notebook's cover, each with ✕ to stop it. A chat you are typing in is not listed; it has its own Stop. Stopping a step stops it for every source, since its queue would otherwise move on to the next one. A step that runs on its own, and automatic audio, then waits under Stopped, on every Mac of your account, until you press Resume; what you ask for yourself, such as Listen, still runs. A step you asked for, such as a report, is only stopped, and asking again runs it.
Beside a chat or the Reader, outside a notebook, a sidebar joins the strip: New chat and Browser at the top, then Notebooks, which opens the Space's All list, where every notebook is (its right-click menu also opens Courses and the Space, here or beside what you are viewing). Under it, Pinned, the notebooks you pinned, and Recent, the last six you worked in, plus the notebook this window last had open. A notebook's row opens it in this window and shows its chats, the chevron shows or hides them, and + on hover starts a chat in it. Its menu has Open in Other Window, Pin to Sidebar or Unpin from Sidebar, Draw Cover With ▸, Archive Notebook, Share…, Share with Team ▸ and Delete Notebook…. Then Chats, the library's own chats, whose + (on hover, or New Library Chat on its right-click menu) starts a library chat; a chat's Move to Notebook ▸ files it in a notebook. "Plan your day?" and Cards to check wait at the foot of this sidebar, or in the window's corner where it is not showing.
Chats work as Codex's do. A chat's menu (right-click, or its ⋯ on hover) starts with Pin Chat, Rename…, Mark as Unread and Hide, then Move to Notebook ▸ and where it opens, and ends with Delete…, which asks first. A pinned chat leaves its list for Pinned, under your pinned notebooks, on every Mac and on the web; drag one pinned chat onto another to reorder them. When a reply finishes while its chat is not on screen in any window, the chat's row shows a dot until you open it, and a folded notebook holding such a chat shows one too (its menu has Mark All as Read). The dots are this Mac's own. In an open chat, click its title to rename it; its ⋯ has Pin Chat, Rename… and Hide too.
The bell above the account is Activity, the one place for what waits on you, as Codex's is: the unread chats (a click opens one) and the ones still running, a teammate's request for a source you hold (Share or Decline, and Share All when there are several), a plugin to reconnect (Reconnect opens its page in Plugins), and the corner cards, "Plan your day?" and Cards to check among them. The bell wears a dot while anything in it is unread, never a number; right-click an item for Mark as Read or Mark as Unread, or use Mark All as Read. A card's ✕ in the corner tucks it into the bell, and what you marked read stays read after you quit, so a card stays out of the corner until it has something new to say.
Inside a notebook only the strip stays, so the notebook's three columns have the window. A rail you hid stays hidden.
The command menu and keyboard shortcuts
Press ⌘K or ⇧⌘P (View → Command Menu) for the command menu, as in Codex: one field, "Search chats or run a command". Before you type it offers Quick actions (New Chat, New Page, Plan the Day in Chat, Today's Review, Keyboard Shortcuts), your pinned and recent chats and your recent Pages. As you type it finds commands, places (the Space, Pages, Sites, Courses, Memory, the Library, Plugins and the rest), chats, notebooks, Pages and Sites, sources (by title at once, then by what is inside them) and Settings panes, grouped and best match first. ↑ and ↓ move, Return opens, Escape or a click beside it closes. A command that has a key shows it at the end of its row.
Help → Keyboard Shortcuts (⌘/) lists every key the app has. The ones that follow Codex:
| Keys | What they do |
|---|---|
| ⌘K or ⇧⌘P | Command menu |
| ⌘/ | Keyboard shortcuts |
| ⌘[ / ⌘] | Back and forward through the places the window showed (a course, the Atlas or a plugin's page keeps its own ⌘[ while you are in it) |
| ⌃⌘S or ⇧⌘S | Show or hide the sidebar |
| ⌘N or ⇧⌘O | New chat (a new window is ⌃⌘N) |
| ⌥⌘N | Quick chat (the Quick Assistant panel) |
| ⇧⌘[ / ⇧⌘], ⌃⇧Tab / ⌃Tab | Previous and next chat in the sidebar |
| ⌘1 – ⌘9 | Go to the chat at that place in the sidebar, pinned chats first |
| ⌥⌘1 – ⌥⌘6 | Open one of the chats started most recently |
| ⌥⌘R, ⌥⌘P, ⇧⌘U, ⌥⌘L | Rename, pin or unpin, mark as unread, copy the link of the chat on screen |
| ⌥⌘S | Side chat about the whole conversation, as /side |
| ⌥⌘A | Next unread chat |
| ⇧⌘A | Hide the chat on screen (Codex's Archive) |
| ⇧Esc | Mark all chats as read |
| ⌃⇧M or ⌃⌘M | The chat's model picker, recent models on top |
| ⌘F, ⌘G, ⇧⌘G | Find in a chat, next, previous |
The Chat menu holds these, New Chat is in File. ForeverLM's own keys: ⇧⌘K Open Chat (chat about the Reader's selection, else the composer), ⌘R Open Reader, ⌘P Space, ⇧⌘L Library, ⌘D Plan the Day in Chat, ⇧⌘D Daily Notes, ⇧⌘B the Pomodoro timer, ⇧⌘I Add Sources… in a notebook, ⌃⌥⌘S Show/Hide Sources, ⌃⌘A the Atlas and ⌥⇧⌘S Save Canvas Version (both beta). Open Chat was ⌘K, a new window ⌘N, Add Sources… ⇧⌘A, Show/Hide Sources and Save Canvas Version ⌥⌘S and the Atlas ⌥⌘A until Codex's keys took them.
On the web, ⌘K or ⇧⌘P opens the same menu over places, chats, notebooks, Pages and sources (Web library).
Plugins
Plugins — the rail's grid icon under Library, or View → Plugins — is where every plugin lives, as in Codex: the built-in ones (X, YouTube, Google Drive, Calendar, Slack, Linear, GitHub, Notion) and then yours (the meeting plugins and the ones you built), each with what it reads and Connected, Not connected or Reconnect needed. Search narrows the list by name. Click a plugin to open its page in the same place, where you connect it, choose what it may read and disconnect it; ‹ Plugins (or ⌘[) goes back. Like the Library it is a pane with its ×, Open Beside and Open in Other Window, and in a notebook window it leaves the notebook. Settings has no Plugins. See Plugins.
The Library
Library — the rail's row or View → Library (⇧⌘L) — spreads the whole library across the window for managing it: every source type, search and filters, each row with chips for the notebooks it is in (a click opens that notebook) and when it was added. Select two or more rows for a bar: "N selected", Add to Notebook ▸, New Notebook with N Sources…, Mark Read or Mark Unread, Hide, Remove…, and × to clear the selection. Opened from inside a notebook, its top line starts with ‹ and the notebook's name, which opens it again. A source clicked here opens in the Reader beside the list.
To have the library beside what you are doing, drag the rail's Library row to an edge of the window, or choose Open Beside on its right-click menu. It docks as a pane next to your chat, a Page or a canvas and draws the compact list, with the same tabs, search and row menus; drag a source from it into a chat, or onto a canvas. Close it with its ×.
Pages, Goals and Not in a Notebook
The Space holds what you keep working on beyond one notebook, one place per kind in its sidebar under New chat: Notebooks, Chats, Courses, Pages, Sites, Canvases (a beta feature, tagged Beta), Images and Google Drive, then Pinned, Recents, your Spaces and, at the foot, Trash. The notebook filter beside the team filter shows All Notebooks, one notebook, or what is Not in a Notebook. A Page's or Site's card has Add to Notebook ▸, with the notebooks that hold most of its sources first under Suggested, and Remove from the notebook it is in. A Page or Site also has a Notebooks checklist in the menu of its own pane.
Everything else you make belongs to one notebook and is listed only in that notebook's Studio: pictures, animations, audio overviews, mnemonic readings, videos, walkthroughs and narrations. A mnemonic reading also shows in its notebook's own Pages list, where it opens; one you made from the Reader outside any notebook stays in the Space's Pages. Walkthroughs, explainers and narrations ride their source: they are in every notebook that holds it, and Walk Through and Listen in the Reader's ⋯ menu reach them too. A picture drawn for a walkthrough or a quiz is in no notebook and shows where it is used.
Working in the Space
The Space's lists come newest activity first, as Codex's do; the sort and filter menu still offers Date Created and Name, and opening a page never moves it. A row's ⋯ and right-click start with Codex's own Rename…, Pin and Move to Trash, then Share…, Copy ▸ and Download as Markdown, then Open in Other Window; ForeverLM's own (Add to Chat, the canvas items, Add to Notebook ▸, Move to Space ▸, subpages, Share with Team ▸, Hide) follow after a divider. Every Recents row has Remove from Recents on its menu, and every space in the sidebar has a ⋯ under the pointer. Pinned pages, canvases and lists share one order: drag a pinned row onto another to move it there.
To act on several things at once, ⌘-click rows or cards to choose them, or ⇧-click to take in a run; while anything is chosen a plain click chooses too. A bar at the foot of the list says how many and offers Move to Space ▸, Pin and Move to Trash (in Trash, Restore and Delete Forever…), with Select All, and × lets them all go; the right-click of a chosen row offers the same. Chats and Images are chosen one at a time.
New ▾ on All and on a space, and New chat's ⋯ in the sidebar, also make an Image (a new chat with "Create an image of" typed, ready for you to say what to draw) and a page from a template: Reading Notes, Literature Review, Lecture Notes or Weekly Learning Log, each a page with its headings, filed in the space you are in.
A space's ⋯ has Move to Trash: the space leaves the sidebar, its pages stay in All, and Trash lists it with Restore (the space comes back with its pages) and Delete Forever…. Things stay in Trash until you empty it, as Trash says at its head; select several there to restore or delete them together.
The search at the head of All, Pages, a space or a team's space finds a page by what it says as well as by its name: every word you type, anywhere in the page, in any case and with or without accents. The magnifier at the top of the Space's sidebar searches every place at once: it opens All with its search ready.
Goals and Ideas have no place of their own in the Space since 2026-10-10: ask the chat ("what are my goals?", "what are my ideas?") and it lists them, and /goal sets a goal. A list of goals or of ideas you want to keep in view is a Space item of its own (New ▸ Goals List or Ideas List).
Courses and notebooks
A course lives in no notebook: it is listed in the Space's All and under its Courses. Opening one shows its page where you are, and inside a notebook, beside the chat. A notebook can follow a course, so its sources and every lecture the course gains join it. A course's ⋯ has Make Study Notebook, Link to Notebook ▸ and Unlink from each notebook that follows it, and its page says "Linked to" them under its title. See Courses.
Uses context from, pinning, merging, archiving
These live on the notebook's ⋯ and its card:
- Uses context from links other notebooks, its context notebooks, without copying sources or nesting one notebook in another. The link is directional and one level deep. A context notebook's sources reach this notebook's chats only once you put it in: each shows under the notebook's own sources as a group, "From <name> · N sources", whose box puts it into the chats, or takes it out. A source you unticked in it stays unticked when it comes back in, and its box shows a dash until you tick it again, which ticks them all. Unfold it to tick or untick its sources one by one. Add a Notebook to Context in the Add sources menu (or the notebook's ⋯) links a notebook and puts it in at once; the group's ×, Take Out of Context, unlinks it. What the notebook's Studio makes reads only its own sources.
- Instructions guide every chat in the notebook; the Description is the short line on its card. The Mac has no settings sheet for a notebook since 2026-10-04: its instructions, description, research questions and linked GitHub repository are changed in Notebook settings in the Web Library, or by an assistant over MCP (
update_notebook). - Pin to Sidebar keeps a notebook under Pinned in the rail; Unpin from Sidebar takes it off and nothing else. A notebook without a row in the rail has its chats under Chats. Pinning syncs to your other Macs.
- Merge into Notebook… folds a notebook into another: you pick the one it goes Into and the merged notebook's name, and its sources (a source in both is kept once), chats, open questions, notes, Goals, tasks, Pages, courses, scheduled tasks, ideas' links, directions and files move before it is deleted (a file whose name both held lands under From <merged notebook>). Notebooks in different libraries do not merge. Over MCP the same is
merge_notebooks. - Archive Notebook retires a notebook; the Space's Trash lists archived notebooks, each with Restore, and an archived notebook opens to be read. Delete Notebook… asks first: its Goals go with it, you choose whether its chats stay in Chats, its folder's files move to the Trash, and its sources stay in your library.
Importing a Gemini Notebook
A notebook from Gemini Notebook (called NotebookLM until July 2026) comes in as a ForeverLM notebook.
- Open ForeverLM's browser, choose the Library profile, and sign in to Google. Signing in to your own web browser doesn't count, because ForeverLM reads the notebook with the sign-in made inside the app.
- Paste the notebook's link (
notebook.google.com/notebook/…; anotebooklm.google.comlink works too) into a notebook's Add sources, or ask your AI assistant to runimport_gemini_notebookwith it.
The notebook it makes takes the Gemini notebook's title, and a notebook of yours that already has that title is reused; a pasted link opens it in that window once it lands. Into it go:
- Sources. A web page or YouTube video comes in by its address, the way a pasted link does, so a paper's page brings its PDF. A Google Doc is linked in Pages. Pasted text, an uploaded file or a PDF comes in as an article holding the text the notebook keeps for it, word for word.
- Chats. Each chat is filed in the notebook as a chat, not a review, so its sources are not marked reviewed. It is linked to the notebook's sources and drawn on the day's log at the hours it ran.
- Notes. Each note, and each written report from the notebook's Studio, becomes a Page in the notebook.
Audio and video overviews, flashcards, quizzes, mind maps and apps stay in Gemini Notebook, and the import lists each one it left there. Importing the same notebook again adds only what is new: a chat that went on since is brought up to date, and a Page is never overwritten, so a note you have edited keeps your edits.
Teams
A team is a second library several people share, stored in its creator's iCloud. Click your name at the foot of the rail: the account menu's Library row names the library that is open and switches between My Library and your teams. Switching reloads Sources, notebooks, Pages and Chats for that library and leaves the rest of the Studio unchanged.
Source rows, notebook rows and a notebook's ⋯, Page menus and chat rows in My Library carry Share with Team ▸, and a notebook's Share invites people to it in one step (Sharing a notebook). A notebook shared into a team you own moves there; anything else is copied into the team and the original stays where it is (Sharing into a team). A paper two members both share is one team record. A notebook's task board is in the Web Library, and in a team notebook its tasks can be assigned to members. Reading progress, review results, highlights and the Schedule stay private to each member. See Teams.
Layout
Outside a notebook, the window has the navigation rail and a center workspace of up to two resizable panes. The library is one of those panes: drag the rail's Library row to an edge to dock it beside another.
| Panel | What it does |
|---|---|
| Navigation (left) | + for a new chat, Spaces, Memory (where today's cards wait) and Library, and at the foot the calendar glyph for today's schedule from the Mac's Calendar; beside a chat or the Reader, New chat, Browser, Notebooks with your pinned and recent notebooks and their chats, and your library's own Chats (The rail) |
| Library | The whole library, organized by type, across the window for managing it or docked beside another pane (The Library) |
| Reader | Displays the selected source: web article, PDF, video, or transcript |
| Chat | In-app source-grounded chat and review sessions |
| Memory | Your cards across every notebook (Memory) |
| Day | Your calendar and what you actually did on a day — the papers read, episodes heard, chats had and Pages written — on one clock. Open it from the Today menu or the calendar glyph |
| Space | Your notebooks, chats and courses, and your Pages, Sites, Canvases, Images and Google Docs across every notebook, one place per kind in its sidebar, with Trash for what you put away and your archived notebooks; with a filter for one notebook or for what is Not in a Notebook. A notebook opens across the window (Inside a notebook). Pages and Sites also open in a pane of their own: Open Pages Beside or Open Sites Beside on the row's right-click menu, or drag the row to an edge of the window |
Click a navigation item to open it in the current pane. Hover it and choose the split icon to open it beside what you are viewing. Inside a notebook, Memory, a source or an artifact opens beside the notebook's chat instead; Spaces and Library leave the notebook, and its row in the rail opens it again.
Drag any saved chat from the navigation rail to the left or right edge of the workspace to open it as a second, independently interactive Chat pane. Each pane keeps its own conversation and composer.
Two work surfaces can remain visible together. Drag Memory, Browser or Library from the navigation rail to either workspace edge, or choose Open Beside from its right-click menu. Artifact rows can be dragged the same way. At two panes, opening another surface replaces the focused pane so each remains readable. Studio restores the saved arrangement on the next launch.
With more than one Studio window open, New chat, an opened chat, and a reader selection sent to Chat land in the window you clicked in. When that window cannot show Chat — every pane there is pinned with Chat parked behind one, or the click came from a popped-out Reader — the chat opens in the other window and a banner in the window you clicked in reads Opened in the other ForeverLM window (or "another" when more than one other is open). A selection's confirmation says the same in one line.
Your day is the Mac's Calendar. At the foot of the navigation rail, over your account, a calendar glyph is always there, with a dot on its corner while something is happening: the event the clock is in, an event starting within 15 minutes, or the bout you are in. In the toolbar of a pop-out Reader the Now chip says the same in words, with how long the event has left and a hairline along its foot showing how far through it the clock is; in a quiet hour the chip is not there. The Today menu in the menu bar has the day's commands at any hour. Click the glyph (or the chip) for today's events: the one you are in highlighted, a line at the time between events, what is behind in grey, and the day's all-day events on one line. A row opens its event in the Calendar app. The event you are in offers its call link when it has one (Join Zoom, Join Teams, Join Google Meet, …), Start Pomodoro Timer…, which asks what the session is for and how many minutes it runs (what is left of the event to begin with, or 15, 25, 45, 60 or 90 in a click) before the clock starts, and Open in Calendar; a block an assistant planned for a notebook adds Open Notebook, and a block that names only sources adds Make Notebook from This Block, a notebook titled as the block with those sources. It reads the calendars you choose in Plugins → Calendar, which turns the Mac's Calendar on and picks which calendar new events go to. A Google, Exchange or subscribed calendar is part of your day once the Mac's Calendar holds it; see Plugins.
An assistant plans the day by adding events to your calendar. Type /plan in a chat (/plan tomorrow for the next day; from 2 PM on, /plan plans tomorrow), choose Plan the Day in Chat from the Today menu (⌘D) or the calendar glyph, or ask Claude or ChatGPT with the ForeverLM plugin. The assistant reads the day and how your last few days went, asks one question — what is fixed, and what the day is for — and proposes the blocks. When you agree, it adds each one as an event in the free time the calendar leaves, with what the hour is for in its notes. Meetings with other people stay where they are: ForeverLM never changes an event with other people on it. /today says what is on the calendar right now. Each morning whose calendar holds nothing you planned (meetings with other people and recurring events do not count), a Plan your day? card waits at the bottom left of the window, with a notification once if ForeverLM is not in front. Switch it off in Settings → General → Day, where Day starts at and and ends at set the hours of your day.
Day, in the Today menu and the last item of the calendar glyph's popover, shows your calendar beside the record the calendar cannot hold: what ForeverLM saw you do on a day, on one clock: a paper read in the Reader, an episode heard, a chat had, a Page written. Delete a sitting there if it did not happen. An assistant reads the same log with get_day_activity beside the calendar, to see where a planned day went.
A learning bout puts a clock on a stretch of learning. Start one from the calendar glyph, on the event you are in or on its own, or from the Today menu (⇧⌘B), and the chip counts it; the bout ends when you write up what you learned and what you still do not understand, and that write-up, never the clock, is what earns the break. A bout past its time keeps running and says how far over it is, because nothing ends it but you. The break is a minute of rest for every nine minutes learned, from five up to twenty, so a ninety-minute bout earns about ten, and it is earned from the minutes actually learned rather than the time you set. Letting a bout go is always allowed and earns nothing. The break counts down on your iPhone too, on the Home screen and in the Today widget, and the phone notifies you when it is over. Claude and ChatGPT can start, end and write up a bout over MCP, because the reflection is usually a conversation rather than a form.
A recurring meeting in your library can be given a schedule: Schedule… on the series' sidebar menu sets the weekdays, the start time, the length and the time zone. When a session's transcript arrives, ForeverLM reads the action items out of it — who agreed to do what, by when, as the transcript said — and an assistant lists and ticks them off with list_meeting_action_items and set_meeting_action_item_done. A Zoom meeting recorded on this Mac is found whether or not Save Captions was on: the watcher reads the recording folders under ~/Documents/Zoom as well as the caption files, files a converted recording as a session of its series, transcribes it, and hands a recording Zoom left unconverted back to Zoom to convert. A call that dropped and was started again is still one meeting: a second session of the same series that began on the same day within four hours of the first is folded into the first as its transcript lands, its text following under a "Reconnected at" line and its files moving with it. Sessions that were split before that get Merge Same-Day Sessions on the series' menu (or merge_meeting_sessions over MCP).
Goals are what you want to be true by a date. They have no tab since 2026-10-10: ask the chat ("what are my goals?") and it lists them with their deadlines, and /goal sets one. A Goals list in the Space (New ▸ Goals List) keeps the ones you choose in view: its Add Goals ▾ sets a new goal or brings in one already made. Each goal shows its date, and how long is left only when it is overdue or due within three days, with its notebook as an optional tag. Move Up and Move Down in a goal's menu put it where you want it; a Goal you placed stays where you put it whatever its deadline does, and Sort Goals by Deadline forgets the order you made. Setting a goal is one sentence and a deadline picked from named days; a notebook (Tag a notebook) is offered below a divider and never required. A Goal can be for a Page, a Site or an animation: click a goal to open what it is for. Its menu has Edit Goal…, Find Directions, Open what it is for (or Link a Page or Site… when it has nothing yet), Change Deadline…, Mark done or Archive, and Delete…, which removes it after asking once: the Goal's record, its source pool and its Schedule tags go, the sources stay in your library, and a chat started from the Goal stays in Chats.
Find directions turns a Goal into research. It sits in the Goal's editor beside Chat about it, in a Goal's or an Idea's menu, and in any chat ("find methods to target rare mitochondrial diseases"). It opens a Deep Research chat that reads the goal's sources, the related papers in your library and your Ideas. The chat searches the literature (PubMed, free) and the web, and saves a handful of Directions. Each is one sentence naming an approach and whom it is for, why it is worth a look now, the papers it rests on, the strongest case against it, and the cheapest test. The row then reads 3 directions · 2 new; click it to read them, open or Add each paper, and answer: Pursue, or Set aside with a reason. The next search reads your answers first and never proposes a direction twice. Claude and ChatGPT can run the same search over the plugin (find_directions, propose_directions).
The Space lists the Pages and Sites you have made or linked, with a place for each kind in its sidebar: Pages, Sites, and Google Drive for the Google Docs you linked. Pictures, animations, audio overviews, videos, walkthroughs and narrations are listed in their notebook's Studio instead (The Studio column). Open Pages Beside (or Open Sites Beside) on a row's right-click menu, or dragging the row to an edge of the window, opens that kind in a pane of its own beside what you are viewing. New ▸ Link a Google Doc… takes a Google Docs link (its Open Google Docs finds one, and a link you copy there is filled in when you come back), and Link a Site… does the same for a Codex site or a Claude artifact. Each Page's and Site's card has a ⋯ with Rename… and Move to Trash. In My Library the Space and the Pages and Sites panes also list what your teams hold (a Page a teammate wrote, a site saved into a team notebook), each with a small two-person mark naming the team on hover; opening one takes you into that team's library. An animation is a moving explanation of how something in a source works, drawn as code that plays, scrubs and toggles conditions, or a rendered video. Ask the chat to animate a mechanism from a paper, use /animate, or pick Animate… from a source's menu; Claude and Codex can save one into your library through the plugin with save_animation. An animation is kept exactly as a Site is, in your library and your own iCloud, and stays linked to the sources it explains, so the paper lists its animations and the animation opens its paper.
Pages in a pane of its own shows your pages as cards, newest first, with All, Published, Drafts, Archived and Hidden filters, a search field and New Page. A new page opens on its title: type a name and press Return, and the caret is in the page (left untitled, the page takes its name from its first # heading). Click a card to open the page; the list beside an open page is unchanged. A Google Doc you link with Link a Google Doc… is listed under Google Drive and opens in Google's editor.
Sites in a pane of its own shows the sites made in ForeverLM and the Codex sites and Claude artifacts you have linked, as cards with All, ForeverLM, Claude, Codex, Archived and Hidden filters, a search field and Link a Site…. A Page you publish on foreverlm.com stays in Pages, with its Published badge and address; Sites holds only sites. Paste a ….chatgpt.site address or a claude.ai/code/artifact/… link and that page opens in ForeverLM as itself; ForeverLM keeps a read-only text copy that chat and review can read, and Unlink turns that copy into an ordinary page in Pages. Select text in an open Site and Add to Chat opens a chat beside it carrying the passage and the Site itself, so the tutor can fix the Site's files in your library; Copy puts a prompt for Claude or Codex on the clipboard. Every Page's and Site's ⋯ menu offers Rename… and Open in Other Window. A site made in ForeverLM lives only in your library: its files sync through your own iCloud, it opens in the Mac app, and a team gets it through the team library. It is never put on the web; for a public link, make the page as a Claude artifact or a Codex site and link it here. Over MCP, write_doc and edit_doc with publish: true update a published page in one call, and link_page with text refreshes a linked site's copy after you changed it in Codex or Claude.
Select words on an open Site and a small bar appears at the selection: Add to Chat and Copy, and on a site of your own made in ForeverLM, Change — a sheet with the selected words; Replace writes the new ones into the page in your library, and the page reloads. The words must appear exactly once on the page, or ForeverLM says so instead of guessing.
Right-click a source in the sidebar, or open the reader's ⋯ menu, for Linked in: the Pages, sites and animations linked to that source (grounded on it, or citing its address), each opening from the menu. It is absent when nothing links to the source.
The Browser row in the rail opens a web browser inside ForeverLM (in a notebook, beside its chat): tabs, an address bar (⌘L; type words to search, a host to load), back, forward and reload. Each tab belongs to a profile, a separate set of cookies and logins. Library is the one the readers and paper downloads share, so signing in to a publisher there helps every paper fetch; any other profile is the browser's alone, which is how ChatGPT can run on one Google account while the Google Drive plugin, which signs in through your system browser, keeps another. The person menu opens a tab in a profile, creates one, or manages them; removing a profile deletes its logins. Add to Sources on the toolbar saves the page you are reading, and hands over the page as the browser rendered it when the publisher will not give ForeverLM's own fetch the text. Open tabs come back on the next launch. Passkeys wait on an Apple entitlement ForeverLM has requested; until it arrives, a sign-in page that asks for one shows a notice with Open in Brave (your default browser), where the passkey works, and a password or code still signs you in here. The linked pages shown in Pages and Sites use these profiles too: a linked Codex site, Claude artifact or Google Doc runs on Library unless you pick another Sign-in Profile in the page's ⋯ menu, and its sign-in notice offers Sign in in ForeverLM Browser, which opens the same address in the Browser pane in that profile so you can sign in yourself; the page picks the sign-in up from there. Use another account is for a site whose workspace belongs to a different ChatGPT or Google account than the one already signed in: it switches the page to a profile you have already signed in with, so that sign-in comes straight back, or gives it a fresh profile through New Profile….
Share, beside the More menu on an open Page, is the one place to say who can open it. Its popover invites people by email (they read the published page, which reads the same for everyone but its author), lists who has access: an Anyone with the link row with Can read or No access, an Anyone at <team> row per team that shares a copy into the team and admits its members to the published page, each reader with a remove control, and you as the author. It ends with one sentence saying who can open the Page, a gear that opens the publish sheet for a custom address, and Copy link. A Page that is not published yet is published by the first invite, or by Can read on the link row; Unpublish… stays in the More menu. Web Studio's publish dialog has the same rows and the same sentence.
The page menu, the ▾ beside an open Page's mark, starts as Codex's does, in its order: Show pages (⇧⌘E), Rename…, Pin, Move to Trash, then Share…, Copy ▸ (as Markdown, or the Page's link) and Download as Markdown, then Open in Other Window. Everything else is under More: New Page, Duplicate, the subpage items, Page Activity, Edit with AI…, Format, View as Page, Page Width, Comments, Add to Chat, the notebooks, canvases, spaces and teams the Page is in, publishing, Convert to Google Doc…, Export and Show in Finder. Move to Trash takes a Page's subpages with it: from the page menu, a Page that has some asks first, and Undo on the notice brings back all that went. Web Studio's ••• on an open Page lists the same, with More for its own items.
Every Page opens in the editor, published or not, ready to type in. Changes are saved to the Page as you type; on a published Page, Update Page in the pane header publishes them to the web page when you are ready, and publishing leaves you in the editor. View as Page in the page menu shows the Page as its readers see it, and Edit comes back to the editor. Selecting words shows a bar over them in Codex's order: Ask for change and Comment, then bold, italic, strikethrough, code and link, then Text styles (the kind of block, to change it); after a divider come ForeverLM's own: the passage's sources (Add sources when it has none), Chat, and Idea on the Mac. There is no underline, because a Page is stored as Markdown, which has none. To have the AI make a change, select a passage and choose Ask for change (the page menu's Edit with AI… is the same), or press AI in the header with the caret in a section (or in a footnote, which edits that note), and say what should change, or press Polish, Shorter, Longer or Simpler. As in Codex, the answer is written straight into the Page as a tracked change: the words it adds washed green and the words it takes out struck through where they stood (a passage rewritten past recognition is washed whole, with the old one struck through above it). Choose Accept (⌘↩) to keep it, Undo to put the passage back, or Ask for change and type another instruction ("shorter", "keep the first sentence") to change the written words again; Undo still brings back the passage as it was before the first answer, and ⌘Z undoes the edit too. Generate in the slash menu writes the same way at the caret, and a visualization is shown in the panel first and written with Insert. The body the edit replaced is kept in Page activity as "Before an AI edit". The ForeverLM logo at the top of that panel chooses the model Pages use: the Default Model until you pick another, and your pick applies to every Page, on the rendered page too, on each of your Macs. On the rendered page itself, select any words, a sentence or a run of paragraphs and choose ✦ Edit with AI on the bubble that appears: describe the change, and the page redraws with the proposal in place under Keep, Try again and Discard. Only the words you selected are changed; Keep writes the change to the Page (with Undo for a moment), and a published Page still updates only with Update Page. To change the words yourself, choose Edit text: the passage's Markdown opens in a field with your selection marked, and Save writes it. Web Studio's Page view offers the same.
Pages open the existing Chat pane to the left of the document. Select a passage and choose Chat to carry that passage and the page's linked sources into the normal persistent chat, with the same model, source, and session tools used everywhere else in Studio. Press ⌘F in a page to open the find bar under the page header; Return and the chevrons step through matches, which are selected and scrolled into view, and Escape closes it. The shortcut reaches the page while you are typing in it; a Reader open beside the page gets ⌘F only while focus is inside the reader.
A page can link to another page or to a notebook. Type [[ and start the page's title: a short list of your pages and notebooks appears at the caret, narrowing as you type; Return writes the one you pick as a link with its title. The Link field (the link button on the bar over selected words) takes a title as readily as a web address, so selecting a few words and typing a page's name there links them to that page. Pasting a web address over selected words links them to it. On the Mac you can also drag a page from the Pages list, or a notebook's row from the navigation rail, onto the page: a caret follows the pointer and the drop writes the link where the caret was. Hover a link to open the page or the notebook it points at. In Markdown the link is [Title](foreverlm://doc/<id>) or [Title](foreverlm://notebook/<id>), which the page tools can write too. On a published Page, a link to a Page that is itself published becomes a link to its web page; a link to a Page that is not published shows as plain text. The Notebooks checklist in the ⋯ menu above a page, and in a row's right-click menu, files the page in any notebook or takes it out of one. In the Space, a page's or site's row has Add to Notebook, with the notebooks that already hold its sources first, and Remove from the notebook it is in; Not in a Notebook in the filter shows what lives in none.
A line that is nothing but a link to the web — a paper under a research report, an item in a reading list — is drawn as a card: the title, a quieter detail such as — Nature, 2024, the site, and what your library says about it. A source you already have carries a filled check that opens it beside the page; one you don't offers Add to Sources, which files it the same way pasting the address into the sidebar would, and turns into the check when it lands. The library a card asks is the page's: a page in My Library asks My Library, and a team page (or your draft of one) asks the team library and nothing else, so a paper only you hold privately still offers Add to Sources on a team page, and adding it there puts it in the team library for everyone; only a team's editors can. Matching follows the library's own rules — the address, its DOI (including a saved preprint's journal DOI), its arXiv id, or for a Nature paper hosted on another site the article id its PDF is named after — and the Markdown stays an ordinary [Title](https://…) link, so a report an assistant writes with create_doc gets the cards for free. Each card carries the source's picture: the same cover the library shows for a source you have, and for one you don't, the page's own preview image or the site's icon.
A link cited inside a sentence gets the same treatment in the margin. Every paragraph that links to the web carries a stack of small cards beside it, one per source, drawn like a row in the Library: the picture, the title, a quieter line — author · venue · year for a paper, the site for a page — and a check that opens the source or a plus that adds it. Two links into one page (an article's Fig. 3 and Fig. 4) are one card. Hover a card to see which words cite it. The prose is untouched; in a pane too narrow to hold the page and a margin column together, the same rows sit below the paragraph instead.
The page is a readable column by default, centred in the pane. On a wide pane that leaves a lot of blank space either side; Page Width in the formatting menu (the Aa button above the page) offers Wide and Full Width, which broaden the column or let the page fill the pane. The choice applies to every page and follows your account to your other Macs.
The slash menu
Type / at the start of a line or after a space in a Page and the slash menu opens at the caret. Keep typing to narrow the list to the rows that match, move with the arrow keys, and press Return or Tab to use the highlighted row; Escape leaves the menu. A row is offered only where it works, so the list differs a little between the Mac app and Web Studio. The groups are Codex's, in Codex's order: Generate, Create, Media, Basic and Mentioned, then ForeverLM's own rows under More.
When what you type after / names no row, the menu offers it as a prompt: Generate — your words writes with the AI from them, and Visualize — your words makes a visualization from them, at once. /generate a short summary or /visualize the cell cycle asks for one of the two by name.
| Row | What it does |
|---|---|
| Generate | Writes with the AI at the caret: describe what you want to write and the AI writes it there |
| Visualize | Makes an interactive visualization from your description. Mac only for now. Type app, diagram, screen or widget after / for Codex's four starters, Visualize (Create an app), (Draw a diagram), (Mock up a screen) and (Build a widget), which open Visualize with the start of the request filled in |
| Page | Makes a new Page inside this one and links to it |
| Image | Puts a picture from your computer into the Page; pasting a screenshot or dropping a picture on the Page does the same |
| File | Attaches a file from your computer for readers to download |
| Generate image | Describe a picture and the AI draws it into the Page |
| Assistant instructions | Adds guidance for assistants working on the Page. It is stored as a quote that starts with the bold words Assistant instructions, so Chat and assistants over MCP read it with the Page, and the AI is given it when it is asked to write or change something there |
| Heading 1 to Heading 3, Bulleted list, Numbered list, Checklist, Quote, Code, Table, Divider | The basic blocks: each changes the block at the caret into that kind |
| Link to page | Links to another Page or to a notebook |
| Prompt | Adds a request that readers can open in Chat. It is stored as a quote that starts with the bold word Prompt |
| Highlight | Draws attention to a note, in a colour you can change from the block's handle |
| Math | A block of LaTeX |
| Files, Pages, Chats, Notebooks, Ideas (Mentioned) | Writes an @ whose list shows only that kind: a file already in this Page, another Page, a chat, a notebook or an Idea. A row shows only when there is something of its kind to mention |
| Chat, Find sources (More) | Opens Chat about the Page, or asks Chat to find sources for it |
| Text, Footnote (More) | A plain paragraph; a numbered note at the caret, as below |
| Today, Tomorrow, Yesterday, Block Reference, Embed Block (More) | On the Mac: a link to that day's daily note, and the notes graph's (( and |
The basic blocks have Markdown shortcuts at the start of a line: #, ## or ### and a space for a heading, - or 1. for a list, [ ] for a checklist item, > for a quote and --- for a divider; a line of just ``` (a language after it if you like) or $$ makes code or a math block when you press Return. Backspace at the start of a heading, a quote or a list item turns it back into plain text before it joins the line above, and Tab in a list item nests it.
The block handle
Rest the pointer on a block and a grip appears to its left, as in Codex: drag it to move the block (a heading takes its section with it, a list item the items nested under it), or click it for the block's menu: Turn into, Insert below, Copy link, Copy as Markdown, Duplicate, Copy block reference (on the Mac) and Delete, with a table's width and column fit and a highlight's colour where they apply. Copy link copies the Page's link with that block as its anchor, foreverlm://doc/<page>#<block>: followed from a Page on the Mac, it opens the Page and scrolls to the block, which flashes for a moment; anywhere else it opens the Page. To reach the menu from the keyboard, press ⌥⌘/: it opens for the block the caret is in, the arrow keys move through it, Return chooses, and Escape goes back to the caret.
Tables
Rest the pointer on a table and, as in Codex, a thin bar appears under it (Add row) and one at its right edge (Add column): a press adds an empty row at the bottom, keeping each column's alignment, or an empty column at the right, and puts the caret in its first cell. The handles on a row and a column move them, and the + on the line between two inserts one there. An empty cell is stored empty (| |).
Page contents
A Page with two or more headings lists them at its right edge, as Codex's Page contents does. At rest it is a column of short grey ticks, one for each heading, the one you are reading darker; rest the pointer on it and the headings' titles open beside it. When the window has room to the right of the writing (and no source cards stand there), the titles themselves are listed there instead, small and grey. Click a title to jump to that heading; a folded section opens to show it, and the caret stays where it was. The list catches up with your headings a moment after you stop typing.
Comments
Comments sit on the words they are about, as in Codex. Select a passage and choose Comment on the bar over it: the Comments panel opens beside the Page with the passage quoted and a field to write in. Commented words are washed yellow in the Page, and the marks follow the words as you write around them. Click marked words to open their thread in the panel; choose a thread in the panel and its words are marked more strongly and scrolled into view.
Each thread is a card: the passage, the comment, its replies, and Reply… under the open thread. A comment's ⋯ has Edit comment, Delete comment (the replies stay; deleting the comment that started a thread hands the thread to its first reply) and Copy comment, and the thread's first comment also has Delete thread, which removes every message in it. Both ask first. The check on a card resolves the thread; resolved threads leave the Page unmarked and are listed under Resolved in the panel's filter, where Reopen brings one back. A thread whose words are no longer in the Page says Original text unavailable. Below the threads, Chats lists the conversations the Page's passages started. Open the panel from the speech bubble on the Page's top line (it shows how many threads are open) or Comments in the page menu's More. Web Studio's Comments has the same threads, replies, edits, deletes and filter, and marks the words the same way.
Chat beside the page
Add to Chat in the page menu, Chat on selected words and a Prompt's Chat about this open a chat as a card floating over the Page, at its bottom right, with the Page and its sources in context; its title lists the Page's chats. The grip above the card works as Codex's: drag it across the Page to dock the card on the other side, or click it for Dock Left, Dock Right, Open in Full View (the chat moves into the Chat pane beside the Page) and Minimize to Corner (a pill that brings it back). The side it stands on is kept on this Mac. The card's × closes it; the chat stays saved under the Page.
Page activity
The clock on a Page's top line (or Page Activity in the page menu's More) opens Page activity beside the Page, in the same place as Comments: the Page's earlier versions, newest first under Current version, each with when it was replaced and by what ("You", "Before an AI edit", "Before a change from another device", "Before restoring an earlier version"). Choose one and it is shown over the Page as reading text, with Copy, Restore This Version and Back to Current (or Escape); the Page and the panel stay open. Restoring keeps what the Page said just before as a version of its own, so a restore is undone from the same list. A version is kept when an assistant or a restore changes the Page, every ten minutes of writing, and when the Page loses more than half its text at once, up to 100 versions a Page. Versions are kept on the Mac that made them; another Mac keeps its own, and a team's Page lists and copies its versions but does not restore them.
Footnotes
A Page takes footnotes the way a Substack post does. Choose Footnote in the slash menu, or press ⌥⌘F, and the next number goes in at the caret while the caret moves to its note at the foot of the Page, under a thin line. Write the note, then press Escape (or Return on an empty line) to go back to the sentence. You never number anything: notes are numbered in the order they are cited, and adding, moving or deleting one renumbers the rest.
- Rest the pointer on a number to read its note without leaving the sentence; click it to go to the note, and click the note's number to come back.
- Deleting a number deletes its note, and Backspace in an empty note deletes its number; Undo brings both back. Copy a sentence with a number and the copy gets a note of its own; cut and paste moves the footnote.
- Footnotes pasted from a Substack post, a GitHub page or another published Page arrive as footnotes.
- A passage pasted from a paper or an article keeps its citation numbers as footnotes: each note holds the reference the article gave that number (a Nature paper names the whole reference), or a link to where the number pointed when the article named none.
- The Page stores them as ordinary Markdown footnotes,
[^1]in the text and[^1]: The note.at the end, so Chat, assistants over MCP and Download as Markdown read them as they are. A published Page draws the notes at the end of the article, and a reader on a computer sees a note by resting on its number.
Pasting from a PDF
Text copied from a PDF, in the Reader or in Preview, comes onto the clipboard one printed line at a time, so a quotation would land as a short paragraph per line. When you paste a few such lines into a Page on the Mac, your Pasted Line Joining model (on the Tasks tab of Settings → Background) says which line ends the page's width made and which end a paragraph, and a moment later the Page joins the lines back into their paragraphs, dropping any hyphen that only split a word. Your words are never rewritten. ⌘Z after the join brings the lines back as you pasted them, and lines you edit before the join arrives are left as you have them. Web Studio and the iPhone paste the lines as they come.
How sources get in
Sources flow into Studio from multiple directions:
- Browser reading lists — Safari, Chrome, and Brave reading lists are scanned automatically
- Apple Podcasts — episodes you've listened to appear after you view the transcript once in Podcasts.app. Apple Podcasts is the only supported player; others like Spotify don't make transcripts accessible to other apps.
- Files — drop a paper's PDF on the Library's Papers tab (or use its Upload PDFs…), a book (PDF, EPUB or DRM-free Kindle) on its Books tab (Add Book…), or PDFs on a notebook's Sources column
- Links — paste a link or DOI into a notebook's Add sources, or save the page you are reading in the Browser with Add to Sources
- Gemini Notebook — paste a notebook's link to bring in its sources, chats and notes as a notebook (Importing a Gemini Notebook)
- AI assistants — Your AI assistant can add sources via the MCP connection
- X (Twitter) — sign in to sync your bookmarked posts
- YouTube — connect the YouTube plugin and import Liked videos or a playlist named ForeverLM
- Meetings — connect Google Drive and choose a meeting folder, use a plugin you build (Read AI, Fireflies, …), or ask an assistant to import transcript files directly. The tab groups sessions by meeting series; turn on By date beside its search to list every session on its own row instead, newest first, each naming its series
Each source type has its own tab in the sidebar. Right-click a tab and choose Customize Source Types… to pin, unpin and reorder the types. When the bar has no room for every pinned type, a ⋯ at its end lists the rest and offers the same. See the dedicated guides for details on Articles, Papers, Books, Podcasts, X Posts, and Plugins (YouTube, X — and build your own for anything else). Courses are not a source type: every course is in the Space (its All and its Courses), and a course's lecture videos and papers are listed under YouTube and Papers as well. See Courses.
Source lifecycle
Every source moves through a simple flow:
- Queued — source discovered, content not yet fetched
- Ready — content loaded and stored in the database, available for reading and MCP access
Once a source is ready, its full text is accessible to any connected AI assistant via the get_source_content or get_app_context MCP tools.
Ready is an import state, not a learning-completion state. Reading state is kept apart from it: Mark as Read in a row's right-click menu or the Reader's ⋯ menu marks an article or paper read.
A video's row says how much of it you have watched, 42% watched and then Watched. Right-click a watched video in the sidebar or on its course's page, or open the Reader's ⋯ menu, for Mark as Not Watched: the video reads as new again on every Mac, its read mark goes too, and a course counts that lecture unfinished unless you reviewed it (a quiz before it holds it back again). Your Schedule, your history and your reviews keep what you did. A video you have started but not finished offers Mark as Watched instead; it needs the video's length, which ForeverLM learns the first time the video plays. An assistant does the same with set_source_read.
Any source can be hidden without being removed: right-click its row and choose Hide, or select it and press Delete, then Hide Source. Hiding one source is purely visual. A hidden podcast episode, paper, article or video leaves the sources list and nothing else: chat can still read and cite it, search still finds it, and reviews still draw on it. Hiding a whole podcast show or YouTube channel is stronger: its episodes are kept out of chat, search and reviews too, and unhiding one episode from Hidden Items brings that episode back into both. To keep a whole family of sources away from the AI, use the per-tab knowledge exclusion in Settings. The tab's quiet hidden items row at the foot of the list opens Hidden Items. Click a hidden source there to read it in the Reader without unhiding it, or click Unhide to bring it back to the list. Several selected rows hide together as Hide N Sources.
After removing a source or collection, an Undo banner appears briefly. Undo before it expires to restore the untouched item. Once the banner expires, normal deletion finishes and re-ingestion may be required.
Schedule
Use Schedule to put sources on specific days and track the week's learning progress. You plan in the conversation: ask Chat, or an assistant over MCP, to spread sources across the week, move one, take one off or clear a day; Schedule for Today on a source's right-click menu puts it on today yourself.
A planned source is done when you check it off in today's list or a review grades it; opening it is never enough.
Reviewed sources
A source becomes Reviewed only after you go back to it with an AI tutor and complete a review session that covers the main points.
Reviewed status comes from linked sessions:
- completed review sessions started through MCP
- completed review sessions from the in-app Chat panel
- saved Claude, ChatGPT, Gemini, Grok, or Edison Scientific session links attached to the source
Studio shows the reviewed date in the source row. That date is used as the anchor for future spaced-repetition scheduling.
Memory
The Memory row in the navigation rail, below New chat, opens Memory: the cards you kept, across every notebook. In a window holding a notebook it opens beside the notebook's chat, and the notebook stays as it was. A notebook's Cards ▸ Open in Memory in its Studio, or its Cards row, opens Memory narrowed to that notebook, whose name sits at its top with an × that shows every notebook's cards again. To review some of your cards — a topic, a source — ask in chat ("show me my flashcards on mitochondria"): the chat chooses the cards by what they ask and opens the card review on them, as practice. It has three sections:
- Review: today's cards, drawn as a deck: how many ("10 cards today", with "6 due · 4 new" under it), or "Nothing due today"; what starting commits you to, Start Review (or Keep Going once today's review is done or you ended it early, so cards waiting always have a button), and Your reviews, a grid of half a year, a square a day, deepening in colour with the minutes you spent; a day reviewed by chat before cards opens that chat. When more new cards are waiting than today's review deals, cards kept today among them, Practice N New Cards asks them now.
- To Check (with how many wait beside its name): the cards drafted for you, dealt one at a time as Review deals them, until you go through them. Over the card are its source (click to open it) and where you are ("3 of 15"); under it, Keep makes it a card you review, Edit keeps it in your words, and Skip drops it for good (K, E and S, and Return keeps), and the next card comes up. Every card works the same way, the ones you asked for too. The ⋯ over the card has Keep All and Skip All for the rest of that source's cards. Show Passage on a card opens its source at the passage the card stands on. A draft you leave stops being offered 14 days after it was drafted. The questions you missed before cards existed are offered here once too: they are kept already, so Keep just says you have been through them, and Skip retires one. A notebook's Studio says how many cards wait on its sources on its Cards row and opens them here, and the Reader's toolbar does for its source.
- All Cards: every card you kept, found by any of its words or its source's title, by source or by notebook. Click a card to edit it: a new question only rewords it, while a new answer or reason starts it over, after asking. Right-click to start it over as it is, keep it in its own words, retire it, or open its source.
Make Cards has ForeverLM draft cards for you, with your Card Drafting model (Settings › AI Models): in the Reader's ⋯ menu for the source you are reading, or in a notebook's Studio (Cards ▸ Make Cards…) for its ticked sources. Choose how many (Auto, about four a source and at most forty, or 10, 20 or 40) and, if you like, what they are for (Focus); the sheet says how many of the sources you have not opened yet and what drafting costs before you press Make. Each source's whole text is read; a source too long for the model is read as evenly spaced excerpts, and the sheet says which. A walkthrough's own questions become cards without a model call, and the rest start from the source's review questions, your highlights and notes, and its ideas. Nothing a source's cards already ask, kept or skipped, is drafted again, and a card whose passage is not in its source is never offered. Every card must stand on its own, since it is asked weeks later among cards from all your sources: a question or answer that points at its source without naming it ("In this lecture, …", "the speaker", "the paper") is caught before the card is saved, with your Card Wording Check model, and reworded once to name its subject (or its source, when the answer depends on it), or left out when the rewording does not fix it. The same check holds rewordings, the questions of a mnemonic reading, and cards an assistant saves. The cards you kept before this check came in are checked once at the evening's day close, a batch at a time within your daily background AI limit: a question that points at its source is reworded in place, keeping the card, its schedule and its answers. The cards you asked for wait in To Check, which opens beside the chat or the Reader once they are ready, never over either; while they are drafted the Reader's toolbar and the notebook's Studio show the run with Stop. A chat about a source or a notebook can make cards too: ask it to, and its reply shows the cards it made, with Check Cards to open To Check beside the chat at them and Keep All to keep them at once. Claude and other assistants can draft cards themselves over MCP with save_card_drafts, or have ForeverLM draft them with draft_cards.
A notebook's Cards row, at the head of its Studio's outputs, says what the notebook holds — "42 kept · 6 due · 9 to check" — counting the cards on its sources, a team copy's included. Practice, on the row and in the Cards menu, gives the window to all of them: the cards you kept that are due, then new ones (one you kept today among them), then the cards still to check, and last the cards not due yet. A card to check is marked To check, and besides Forgot and Remembered it has Skip (S), which drops it for good, and Edit (E), which keeps it in your words; answering it keeps it. Practice is yours to start and stop: it commits you to nothing, and an answer to a card that is not due yet is shown but not counted, so practising never pushes a card's next review further out. Make Cards… is there too.
ForeverLM also drafts cards on its own as you finish sources: when you mark one as read, read an article to its end, mark a video watched or finish listening, and, at the evening's day close, from sources you finished or highlighted in the last ten days. It drafts a few sources a day, as many as your New cards each day fill at about four cards a source (three sources at the default ten), the ones in a notebook with a block on today's calendar or an open Goal first; the rest wait their turn for up to ten days. A source you only read part of is drafted from what you read and highlighted, and one you only talked about in a chat from what the chat covered; a source that already has cards is never drafted again on its own, only by Make Cards. These drafts arrive unticked in To Check, and a Cards to check card in the corner of the window, where "Plan your day?" sits, says how many wait: Go Through Them opens To Check, ✕ asks again tomorrow, and Don't Ask Again in its right-click menu turns it off. The morning after you finish something, the Mac also sends one notification at the hour your review is ready by, "14 cards from 3 sources you finished wait to be checked", which opens To Check; with drafting off, it says how many finished sources have no cards yet and opens Make Cards for them. Each source is mentioned once, and Say when drafted cards wait turns the card and the notification off together. Drafting uses your Card Drafting model and stops at your daily background AI limit. Settings → General → Memory review has New cards each day, Draft cards from what you finish and Say when drafted cards wait, Prepare review questions ahead of time, and Close the day at, with its own switch and a line saying what the last close did; an assistant changes them with set_memory_review_settings. Prepare review questions ahead of time writes the questions for up to six sources a day you are likely to review, today's scheduled ones first, so a review on the Mac, the phone or in the car starts at once; it uses AI and stops at your daily background limit, and with it off a review still runs.
Cards can carry up to four pictures on either face. Question pictures appear with the question; answer pictures stay hidden until you have answered. Two or more pictures share a comparison grid, which is useful for putting two paper figures side by side. The pictures are durable ForeverLM source or generated-image references, so a device that has the underlying source or image shows the same pixels and one that does not shows the saved description instead.
Start Review gives the window to today's cards, one at a time. Under the question, type your answer or dictate it (Return checks, Shift-Return starts a new line), then press Check; the card never turns over without an answer, and I Don't Know shows the answer with the card counted as forgotten. Your answer stays on the card above the fold, and under it ForeverLM's check of it, with your Card Answer Check model (Settings › AI Models; the chat's model unless you choose another): Right, Partly or Not quite, and a line on what was missing or wrong. Then the answer, why it holds and its source. The check picks the grade: a right answer is Remembered and one partly right or wrong is Forgot, drawn dark, and Return takes it. The check can be wrong, so the other button says I Was Right or I Was Wrong, and what you choose is what is recorded; ← and → (or 1 and 2) still answer Forgot and Remembered as before, even while the check is still running. When the check cannot run (no model, or the request failed), the card says so and you grade it yourself. Only the card's question, answer, why and passage, and what you answered, are sent. Over the card, a strip shows the round a card at a time, a forgotten card in orange, and the edges under the card are the cards still to come; an answered card goes off toward its key's side. Under them, unless the check found the answer partly right or wrong, Go Deeper (D) answers the card Remembered and then, in place of the next card, asks one question that goes past it: the principle behind it with no names in it, where else it applies, what would prove it wrong, or what it is like, beside an idea from a source in another of your notebooks. The kind changes each time. Type your answer (Return sends, Shift-Return starts a new line) and a few sentences come back on what it got and what it could add; Next Card (→) is there all along, so you can skip the question. A card that is a bare fact gets no question, and nothing of your answer is kept. A card you have remembered twice may come back worded differently, on purpose: the answer is the same. At the evening's day close ForeverLM writes three rewordings of such a card and keeps only those a separate check finds ask for exactly its answer without giving it away. If a rewording asks something else, its ⋯ says This Asks Something Else: that rewording is dropped and the card is asked in its own words. Always Ask in Its Own Words keeps a card from being reworded, and a rewording you miss more often than the card's own words drops itself. Rewording, like the day close's idea extraction, stops at your daily background AI limit and picks up the next evening. Its source opens in the Reader beside the card, at the passage it quotes, without ending the review. A round ends with how it went: Review Forgotten asks the missed cards again without counting them twice, Continue deals what today still holds, and Done closes it. Starting today's review commits you to the day's minutes (fifteen by default): the clock counts while the cards are on screen, and leaving before you have answered the first round ends today's session, as the ✕ by the clock asks first. An ended day does not count, but Keep Going still deals its cards. Once no notebook has a card left today, the day is done, whatever the clock says. The daily reminder and the Today menu's Today's Review… open Memory too. On the iPhone, the Memory line on Home while cards wait ("6 due · 4 new"), Home's Memory row, the daily reminder, the widget and Siri open the same review, drawn as the same deck, one card at a time across all your notebooks: tap All notebooks at the top to narrow it to one, type or say your answer (the microphone in the answer field) and tap the arrow to check it, or I Don't Know; the check's verdict shows on the card and fills the grade it gives, the other button saying I Was Right or I Was Wrong, and the card goes off to the left or the right; the card's source opens in the Reader, and Back returns you to the card. A round ends the same way, with Review Forgotten, Continue and Done, and with nothing due, Practice New Cards offers the new cards today leaves out, such as the ones you kept today. A notebook's Studio tab on the iPhone has its Cards row ("42 kept · 6 due · 9 to check"): tap it to go through its cards to check while any wait, or else to practise the notebook's kept cards. Memory's Review on the iPhone draws today's cards as the same deck, with Start Review under it. Memory's To Check on the iPhone deals the cards one at a time as the Mac does, with its source and "3 of 15" over the card and Skip, Edit and Keep under it; swipe the card right to keep it or left to skip it, and ⋯ keeps or skips the rest of its source's cards. Claude or another assistant can run the card review in its own chat with the plugin: get_due_cards gives today's cards with the wording to ask, the assistant asks you to answer each in your own words before it says the answer and judges your answer itself, record_card_result records each answer as Forgot or Remembered would, and update_card rewords, starts over or retires a card on your word.
Mnemonic readings
A mnemonic reading is a book read with its questions in it, the way quantum.country's essays are written: each chapter's own text, set as the Reader sets it, with a recall question right after the passage it tests. Make one from a notebook's Mnemonic reading tile for its ticked sources, or from the Reader's ⋯ ▸ Make Mnemonic Reading… for what you are reading (in a book, This Chapter or Whole Book). Choose how many questions — Auto, about one for every 350 words; Fewer; More — and the sheet says what writing them costs before you press Make. Your Mnemonic Reading Writing model (Settings › AI Models) writes each source's questions from its whole text; a source too long for the model is read in consecutive parts, never sampled, and a question whose passage is not in its source is dropped. The reading opens once its first source is written and fills in as the rest are, its row in the notebook's Outputs saying how far it has come, with Stop. A source that failed or was stopped waits in the reading under Write Questions.
On a paper or book you read as a PDF, the questions are drawn on the PDF itself instead of in a separate reading: a small marker in the margin beside each passage (? to answer, ✓ answered, ↻ due to answer again). Click a marker to see the question; Show Answer, then Forgot or Remembered, as in the reading, and the card is kept in Memory. The chip at the top right counts the questions and has Next, which goes to the next one you have not answered, and a switch that hides the markers so you can read the page bare.
Read it as you would the chapter. At a question, answer in your head, press Show Answer, then Forgot or Remembered. Either answer keeps the question as a card in Memory, with that answer as its first, and the card review asks it again on its schedule, never on the day you answered. An answered question folds to one line with its grade and when it comes back; a click opens it again, and while it is due you can answer it there as well. The head of the reading counts the questions, how many you have answered and how many are due, and Next Question goes to the next one you have not answered. A reading sits with the notebook's outputs and in the Space's Pages; shared into a team, it carries its questions and never your answers, which stay in your Memory. Claude and other assistants can make one with generate_mnemonic_reading, save questions they wrote with save_mnemonic_reading, and go through one with get_mnemonic_reading and answer_mnemonic_question.
On the iPhone and iPad, a notebook's Studio tab lists its readings with its other outputs. Tap one to read it the same way: Show Answer, then Forgot or Remembered, a tap on a folded question to open it again, and Next Question at the top. Your answers there are kept in the same Memory as on the Mac. Readings are made on the Mac.
In-app Chat
The Chat panel lets you ask questions and run reviews without leaving ForeverLM. It uses the chat model you choose in Settings → Chat, on your own OpenRouter key, records review exchanges, and links completed sessions back to the sources they covered.
The rail and the Space's Chats list both in-app sessions and external chats saved from Claude, ChatGPT, Gemini, Grok, or Edison Scientific.
Selecting text in a reader
Select words in any reader — article, PDF, book chapter, podcast, meeting or YouTube transcript — and a small bar appears over the passage. Chat carries the passage into a chat, the same thing ⇧⌘K does. Side chat (the split bubble beside it) asks about it without leaving the page: a small chat opens over the words, answers from the source, and stays until you close it with its ×; the arrow in its corner moves the conversation into a full chat beside the Reader. Highlight (the marker) saves the passage as a note anchored to those words.
To search a transcript, press ⌘F or choose Find in Reader from the Reader's ⋯; Escape closes the search. A video's own commands are under ⋯ › Video: Show Slides, Extract Papers and Papers, where the transcript sits (Move Transcript Below Video or Beside Video), Hide Transcript and Theater View. A podcast's are under ⋯ › Speakers: Update Speakers with AI and Edit Speakers Manually…. In a notebook, ‹ in the Reader takes you back to the Page or chat it opened from.
The Reader's title drags its source into a chat, so its words do not select; right-click the title for Copy Title.
Text to Speech
Use Text to Speech from the Reader's ⋯ menu or source menu to listen to articles and text sources. The playback bar supports pause/resume, 15-second seeking, speed controls, and stop.
Text-to-speech settings live in Settings -> Voice -> Text to speech. Every voice is a speech model OpenRouter serves, run on your own OpenRouter key, and the audio it makes is kept, so playing it again costs nothing.
Explainers
A paper, an article, a podcast episode, a video or a meeting can also be explained rather than read. Generate Explainer, in the Reader's ⋯ menu or a source's menu, writes a spoken explainer of the source — why it matters, what the authors set out to find, how they did it, what they found and what it changes; for an episode, video or meeting, read from its transcript, the question the conversation takes up, what each speaker claims and why, and what is left open — about seven minutes long, saves it as its own source titled Explainer: … beside the original, opens it, and generates its audio with your text-to-speech voice, asking about cost the way Generate Audio does — unless automatic audio is on for Explainers, in which case the audio starts without asking. Automatic audio has no Settings pane; ask the chat to switch it on (see Text to Speech). An explainer is an ordinary source: it syncs to your iPhone with its audio, can be reviewed in Chat, and is deleted with the source it explains. While the explainer is being written a banner at the bottom of the window offers Cancel, as do the × beside the Reader's spinner and Cancel Writing Explainer in the source's menu; stopping saves nothing, and a source that already had an explainer keeps it. Explaining a source again rewrites its explainer. The writing model is the Explainer Writing task: give it a model of its own on the Tasks tab of Settings → Background, or ask the chat (set_ai_task_settings).
Walkthroughs
A paper, a book chapter or an article can be walked through in the chat beside its own text. Write Walkthrough, in the Reader's ⋯ menu or the source's menu, writes a guided walk: ten to thirty steps, one point each, each pointing at something printed in the source — a figure, one of its panels, or a quoted passage. The chat beside the Reader then plays it, one step at a time, as a message you can read and reply to: the step's title and explanation, the panel it is about shown enlarged when the page is not beside the chat (press it for a larger view; when the Reader is beside the chat, the outline on the page is the control — the pointer over it is the zoom-in cursor and a click opens the panel or figure large), and — above the message — the figure's label and printed title as a chip that takes the page straight back to it, with the figure's panel letters when it has several so you can follow the explanation panel by panel. On a paper or a chapter of a PDF book the figure or passage is outlined on the page; an article or an EPUB chapter is text, so its steps quote passages the Reader scrolls to and flashes the way a citation is shown. Some steps play a small code-drawn animation of the mechanism a still figure cannot show, under the message, with Enlarge to see it larger. A thin strip under the chat's title says where you are — step n of m, with Back, Next and a menu to jump to any step. Playing a step calls no model; whatever you type between steps is answered by the tutor with the source attached, and Next resumes. About one step in three is a question, answered in your own words (or, for some, on the figure), and the tutor's reply is the grade — what you got right, what you missed, then the reference answer. The walk is an ordinary chat, saved among Chats and linked to the source, so reopening it later shows the same steps and the strip where you left off. Walk Through joins the chat beside the Reader when that chat is empty or already about the source, and otherwise opens a new chat on it. The steps appear as soon as they are written; the animations arrive one by one behind them. Every figure label and quoted passage is checked against the source before it is saved, so a step never points at something the source does not print. A source keeps one walkthrough, kept only while its text is unchanged; Write Walkthrough Again replaces it and Remove Walkthrough deletes it. A book is walked one chapter at a time: each chapter has its own walkthrough, and Write Walkthroughs for All Chapters on the book's sidebar row writes the chapters that have none, one after another, steps only (no animations, so the cost is one writing call a chapter). Selecting words in the source and pressing Chat asks about them in the same chat. The models are the Walkthrough Writing and Walkthrough Animation tasks, each on the Tasks tab of Settings → Background, or ask the chat to change them (set_ai_task_settings). An assistant can write one too: save_walkthrough, generate_walkthrough, get_walkthrough and delete_walkthrough in the MCP tool reference; and the chat's own tutor can point the Reader at a figure, a panel or a passage while it explains, the way a step does.
An animation can be walked through too. Walk Through in an animation's menu opens the chat beside it and plays the animation's own walkthrough, one step a message; each step pins the animation to one of its steps, under the conditions the step is about, so the drawing follows the explanation the way a paper's figures do, and a question step asks about what you just watched. Any walkthrough's step can also show a saved animation at a chosen step instead of a small inline drawing — the card under the message plays the animation's page there, and Enlarge opens it large. Animations get their walkthroughs from an assistant: Claude or Codex saves one with save_walkthrough (an animation built with the kit writes its steps for it).
A YouTube video can be walked through too, by its talk. Each step is a moment of the video: when the chat beside it plays a step, the Reader moves the video to that moment and holds it paused, so you read the step's cards over the slide the speaker was showing, and press play to hear it. The time on a card takes the video back there. A video's walkthrough comes from an assistant: ask Claude or Codex to walk you through the talk, and it saves the steps with save_walkthrough, each at its moment; ForeverLM's own writer walks text only. Walk Through appears in the video's toolbar once it has one.
A quiz after every lecture
A course can be laid out the way Khan Academy lays out a unit, with lectures and quizzes alternating. Open the course from the Space's Courses and choose Quizzes ▸ Write Quizzes in its ⋯ menu. ForeverLM fetches any missing lecture transcripts, then writes the whole ladder ahead of time:
- a practice quiz after every lecture, about that lecture;
- a checkpoint quiz where a topic ends, about every four lectures, across them, with some questions that connect one lecture to another. The parts of a lecture series ("Ion Transport 1" to "4") share one checkpoint, never split across two;
- a course test at the end.
Each quiz is written like the problems at the end of a textbook chapter. It covers every learning point: the writer first lists every key point and fact of the lecture, and a point it leaves without a question is asked for again before the quiz is saved. It works up from Recall through Explain and Apply to Challenge problems that take a few steps. When a lecture has readings, the pages of a textbook planned for it or a source filed under it as a reading, its quiz asks about them too, after the video's questions, and the checkpoints and the test over that lecture do as well. A reading's question names its page. They appear on the course's page in that order, each practice quiz on its lecture's card, and a row at the top shows the progress while they are written. Writing is one call per quiz, one more for each reading of a practice quiz's lecture, and one more when a learning point was left without a question. Write Missing Quizzes writes only what is not there yet, and Rewrite All Quizzes starts over. To write or rewrite one lecture's quiz, right-click the lecture and choose Write Quiz. Open a quiz with a click. It opens in the chat: the tutor asks one question at a time, showing the slide or figure it is about, and you answer in the chat's own box, typing or dictating. Every answer is graded, "I don't know" included, on the model you are running the chat on, in a check of its own, so the tutor never sees the answer before you do. An answer that is basically right counts as right. One that is on its way but leaves out part of what the question asks gets one short follow-up question first, and your reply is graded together with your answer. There is no peeking, but you can skip: the skip icon (⏩) under the tutor's latest message, beside copy, or just saying so, moves on to the next question. A skipped question gets no grade, nothing goes to Memory and its answer is not shown, so a retake asks it again. It counts as not right in the score. The reply says whether you had it, gives the answer and why when you didn't, and links to that moment of the lecture, or to the page of the reading. If the model stumbles, the grade is asked for again; if it still cannot grade, the chat says which model failed so you can pick another in the model chip. You can stop and ask about anything along the way. Close the chat halfway and the quiz waits for you: its row reads In progress, a click on it (Continue Quiz) takes you back to the next question, on any of your Macs, and Start Over in its menu begins again. A finished quiz opens on its results, as on Khan Academy: a click (or See Results) shows the finished chat, and Retake Quiz starts a new sitting, with the row keeping your score until the retake has an answer graded. Where a picture makes a question clearer, the quiz shows it: above the question, or with the answer when the picture would give it away. It can be a slide of the lecture, a figure printed on the reading's pages, or a diagram ForeverLM draws when nothing in the lecture or reading shows the point. By default a newly written quiz tries to give every question a picture where one helps: a slide or figure from the course first, and a drawing where nothing in it shows the point. The drawings, up to twelve a quiz, are made on your image model while Draw pictures for new quizzes is on in Settings › AI Models › Images (the default), and each is kept with the quiz that shows it. Quizzes written while the lecture's slides are captured get their slides as they are written. For quizzes written before, choose Add Pictures to Questions in a quiz's menu, or Add Pictures to Quiz Questions in the course's. It captures the slides first, then adds slides, figures and drawings without changing a question. An assistant doing that retroactively adds only source pictures by default; separately billed generated diagrams require an explicit model/request/cost confirmation first. A picture drawn for a quiz shows on every Mac you use, and for everyone in a team you share the course with. An assistant can pin a picture it drew, or one you made in ChatGPT, Claude or another app and kept with save_image, to a question with set_course_quiz_picture. A finished quiz's tile wears a check, green, orange or red by your score, and one under way a thin progress bar. At the end you get your score and what to take away. Each quiz row keeps showing your latest score, on every Mac you use, and the quizzes themselves sync with the course. A question you miss goes to Memory. Remove a quiz from its row's menu. The models are the Lecture Quiz Writing task (practice quizzes) and the Course Quiz Writing task (checkpoints and the test), and answers are graded on the chat's own model. An assistant can do all of this too: generate_course_quizzes, add_course_quiz_pictures, get_course_quiz, save_course_quiz, set_course_quiz_picture, rename_course_quiz, delete_course_quiz and record_course_quiz_result, and get_course lists every quiz in its place. An assistant that quizzes you in its own chat saves each answer as soon as it has graded it, into the same sitting: the quiz's row reads In progress, a click on it picks the quiz up in ForeverLM where the assistant left off.
Quiz pictures are placed by ForeverLM from the stored quiz, not left to the tutor model's formatting. If a tutor omits an answer picture or the next question's picture from its prose, the app inserts it into the visible reply before saving the chat; a picture the tutor did include is not duplicated. An answer's slide comes with the link to that moment of the lecture as its caption along the bottom ("▶ From 10:54 · Lecture title"), so you can see where it comes from and jump there; a page of a reading gets its page the same way. A slide you saw with the previous answer is not shown again, and a line sets each next question apart from the feedback before it.
A quiz you haven't finished holds back what comes after it: once every question is answered or skipped, the rest opens, whatever the score. Until then, the lectures, readings and quizzes after it show a lock on the course's page, and a video that would play the next lecture by itself stops and offers the quiz instead. What you've already watched or read stays open. Three in four right is still a pass, and a missed question can be answered again in the quiz's chat to raise the score. To let a quiz stop standing in the way, rewrite it or remove it.
Readings from a textbook
A course can take a textbook from your library as targeted reading. Choose Lectures ▸ Add Textbook… in the course's ⋯ menu, or drop a book on the course. Pick the book, say where you're coming from in About you (your background, what you know well, what's new to you), and, if you like, what you need from this course. ForeverLM reads each lecture and the book's own sections, and after each lecture places the sections worth reading for you: the ones that build what the lecture assumes or develops and you don't have yet. Each reading shows its length in pages and, on hover, why it is there. A lecture the book adds nothing to gets no reading, and what your background already covers is left out. Click a reading to open the chapter at its first page. Adding the same book again replaces its readings; the videos and quizzes stay.
About you is kept for every course: change it in Settings › General. The course's quizzes and generated courses are tailored to it too. The readings are planned by the Textbook Readings task, in one call. A connected assistant normally selects the pages itself and saves them with save_course_textbook_readings, which makes no ForeverLM model call; add_textbook_to_course is the explicit paid automatic alternative. get_course lists the readings in their lectures.
Explainer videos
A concept can be filmed as well as spoken. A film ForeverLM made is a video in your library, listed in the Studio of each notebook that holds it, and plays in Videos with its storyboard underneath. New Video (the + in the pane, or Generate Explainer Video… in a paper's or article's menu, or /video followed by the concept in the chat) asks what to explain in your own words, an optional paper or article to lean on for the facts, and a length — brief (3 scenes, 24 seconds), standard (5, 40 seconds) or extended (8, 64 seconds). The Explainer Writing model storyboards the concept into eight-second scenes, each with a narration line and a shot, and your video model films every scene through OpenRouter with its own sound and a narrator's voice; ForeverLM joins the clips into one film and saves it as a video source whose text is the narration, so it syncs, searches and reads on your iPhone like any other source. A film costs dollars rather than cents, so the exact price — scenes × the clip length × OpenRouter's published rate at the chosen resolution — is shown before anything runs and asked every time; a scene the model could not finish is not charged. A few models are priced by video tokens instead, and for those the question says the cost is known once the clips are made. Settings → AI Models → Videos lists every video model OpenRouter serves that films from a prompt (Veo 3.1 Fast by default), with its price a second, and the resolutions the chosen one films at; a model marked Silent makes a film with no narration. The chat can change them too (videos.model and videos.resolution). While a film is being made its row in Videos shows the stage and offers Cancel; a cancelled or failed film leaves nothing behind.
Using sources with AI assistants
Drag a source from the Library into Claude, ChatGPT, Gemini, Grok, or Edison Scientific. Your AI assistant can then:
- Answer questions about the content
- Compare ideas across multiple sources
- Quiz you on the material using the explain-it-back review
- Probe your understanding with Socratic dialogue
For hands-free access where your AI can search your entire library without dragging, you can optionally connect an AI assistant. MCP traffic passes through ForeverLM-operated Cloudflare infrastructure.
A connected assistant makes an artifact with the model or media allowance you already have in that client whenever it can, then saves the result into ForeverLM: for example, it writes a quiz and calls save_course_quiz, or makes an image and calls save_image before pinning it to a question. It does not choose a paid ForeverLM generator merely because one is available. If the paid route is necessary or you choose it, every paid assistant operation has a $3 default ceiling; a higher approved_spend_usd is used only after you see the estimate or published maximum and explicitly approve it. Reaching the ceiling keeps completed work and stops before the workflow starts another paid request.
Semantic search
Use semantic search to find sources by concept across your entire library. This uses vector embeddings to find semantically similar content, not just keyword matches.
Your AI assistant can also search your sources programmatically: search_sources_semantic for a topic, and search_sources_keyword when you want every source that mentions a particular word, name, or phrase.
Deep Research
Choose Deep Research from the + at the left of a chat's composer to research a question across the live web. ForeverLM searches from several angles, writes the report into a Page, and lists every page it read under the reply as Web sources; Add sends one through the normal article or paper import pipeline. Research results never enter the library automatically. See Deep Research.
LLM calls during import
ForeverLM uses lightweight LLM calls at two points during source import. Both are background tasks: they run on your own OpenRouter key on the Text-only model in Settings → Background, and each can have a model of its own on its Tasks tab (Source Classification, Transcript Formatting); the chat can change them too (set_ai_task_settings).
| What | Model | When | Why |
|---|---|---|---|
| Source classification | Your Background text model | When a URL matches a journal domain (Nature, Science, etc.) | Journals publish both research papers and editorial content on the same domain. The LLM distinguishes papers from news/commentary so they land in the right tab. Also runs after fetching article content to catch papers hosted on non-academic domains. |
| Transcript cleanup | Your Background text model | After extracting a YouTube or podcast transcript | Raw auto-generated transcripts lack formatting. The LLM adds paragraph breaks, speaker labels, and removes filler words while preserving all substantive content. |
Both calls are optional: if one cannot run, the source still imports, and a transcript just stays unformatted.
Dealing with paywalled content
When ForeverLM can't fetch a source's content (HTTP 403), download the PDF yourself and drop it onto the source's row, or choose Attach PDF File… from the row's right-click menu.
For papers specifically, open-access sources (arxiv, bioRxiv, PLOS, PMC) are fetched automatically. See the Papers guide for details.
Tips
- Drag the source itself. A paper with its PDF arrives in the other app as the PDF, any other text source as a text file.
- Use semantic search to find connections between sources you might not have noticed.
- Batch processing: sources stay in your queue until you're ready. No rush to process everything immediately.
Screen record mode (admin only)
On the Mac, Settings → Data & Privacy → Screen recording limits what appears while filming. The selected notebook and permitted sources can remain visible. Chats, notes, Pages, walkthroughs, generated outputs, and cards appear only if created after screen record mode was turned on. Filing older work into the notebook or citing a permitted source does not reveal it. Turn the mode off and on to start a new take. Nothing is deleted, and these settings do not sync to other devices.
The public-source option includes Apple Podcasts catalog episodes. Private RSS feeds and episodes identified only on this Mac remain hidden.